
Heyo!
My name is Terry and here’s all my work from Year 1 Semester 2 of Sheridan’s Animation Program.
If you want to see my work from last semester, you can find it here.
A Break Down of Year 1 Semester 2
The second semester of Sheridan’s Animation Program has a total of nine courses broken into ten classes:
- Character Design: 2 hour class
- Animation: 2 hour class
- Life Drawing: 3 hour class
- Digital Painting: 2 hour class
- Layout: 2 hour class
- Digital Tools: 2 hour class
- Story Development (composed of two classes)
- Storyboard Class: 2 hour class
- Story Principles Lecture: 1 hour class
- Animation History: 3 hour class
- Elective: varies, I have a previous degree in business so I am exempt from taking electives
Character Design Class
Our first assignment is to create an animal character and have them interact with a random object to tell a short story over a series of panels.
I created a fox and had him steal an egg. Here’s my sequence:

Next, we must create an anthropomorphic character timeline (baby, toddler, teen, adult, elderly). The focus for this assignment is to make sure the character is recognizable as the same character in every age.
I created a ladybug that grows up to become a butterfly.

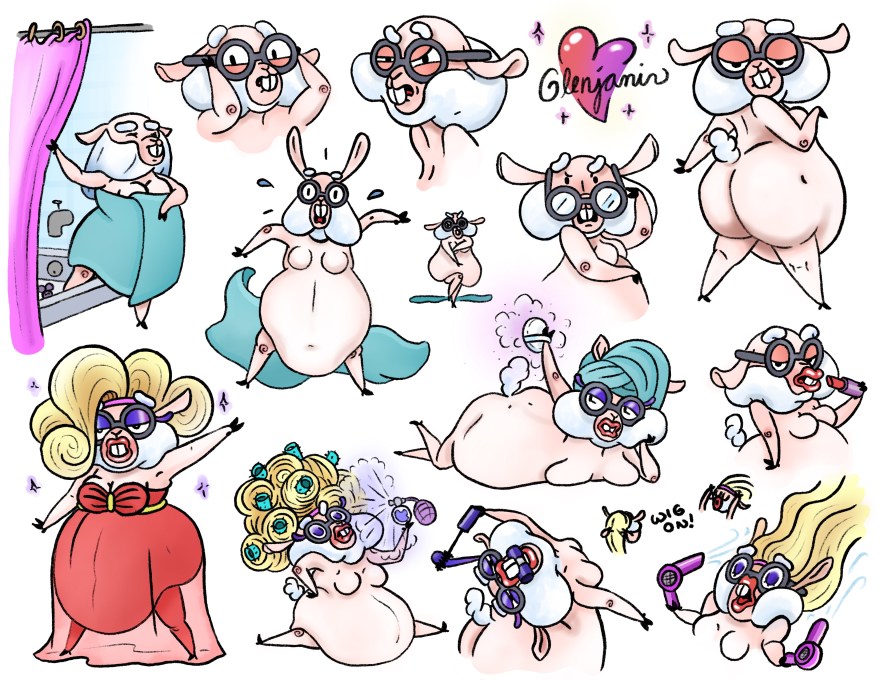
The next assignment is to create a complete character sheet (expressions and poses) with a new anthropomorphic character.
I chose to create a drag queen sheep and used the elegant Grant Vanderbilt as inspiration.
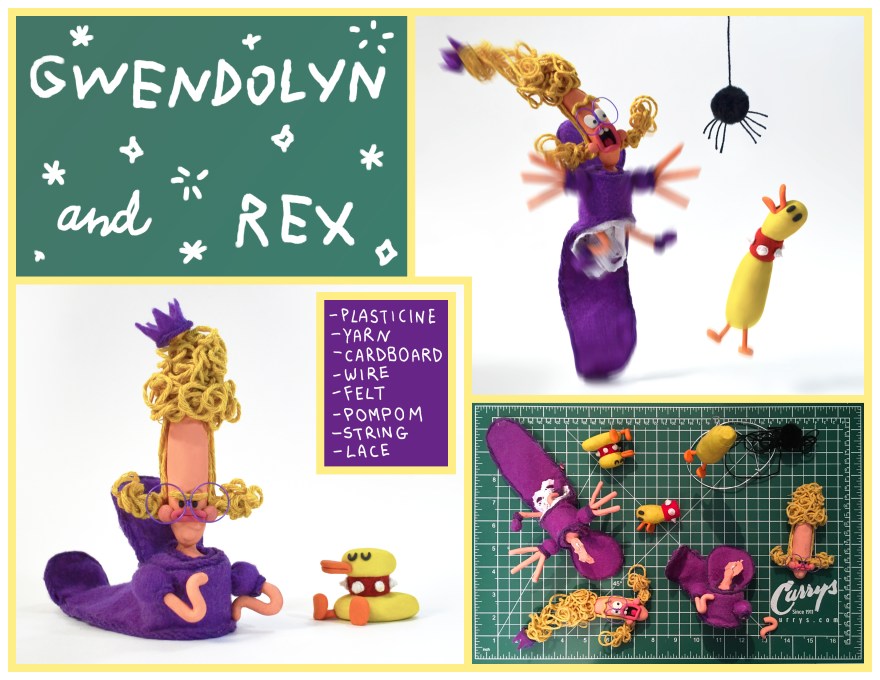
Our last assignment is to create any character we want in any medium we want. The point of this is to find our voice as an animator and do something entirely in our own style with no limitations.
All we have to do is show two poses of our character and explain (visually or in writing) how we created the character.
I’m a big stop motion fan, so I decided to create a stop motion character.
Here is Gwendolyn and her duck Rex:


Animation Class Assignments
Our first animation assignment of the semester is to understand how to create a walk cycle using the conveyor belt method.
You can see the conveyor belt under the bug – the lines with the numbers. Basically the numbers tell you which frames the legs should be in different positions. It’s useful in creating an infinitely looping animation.
The professor provides us with a number of key frames (drawings of the bug in different walking poses) and all you have to do is draw the inbetweens. Alternatively, you could choose to animate the Pink Panther for this assignment.
After completing the bug, you can move on to animate your own original character in a walk cycle.
I wanted to challenge myself, so I created a skipping cycle for a robot I designed. I added a mouse trailing behind him to demonstrate a neutral walk cycle (no skipping) and threw a baby in for good measure.
Next we learn how to lip sync.
For this assignment, we must find the model sheets of an established animated character (2D/3D) and create a 360 degree head turn first.
After the head completes a full rotation, it must say, “meow” from prerecorded audio and then show an expression.
I chose Kuzco from The Emporer’s New Groove – one of my favourite movies.
Next we must animate a bipedal animal walking on all fours. This is a much more complex walk cycle, because each leg moves at a different pace.
I also wanted to challenge myself with this one, so I animated a panther breaking out into a run and pounce combo before returning to a neutral walk cycle.
A lot of animators use reference videos to help them understand how an animal moves. I was able to find a good panther walk cycle for reference, but not for the running and pouncing. Instead I had to study cats and dogs running, and a tiger pouncing to figure out what it should look like. I don’t think I was entirely successful, but I’m happy with the overall result.
The next assignment is a continuation from a character design assignment you saw above. You must rough animate a segment from the character sequence you created to show timing and motion.
Here’s my sequence again from Character Design class:
Below is my rough animation of it. However, I decided to animate my entire sequence instead of just a portion. Unfortunately I didn’t have time to get it all done, so the video below is cut a bit short.
Lastly, we have to animate a flour sack jumping in twice from the background and then interacting with a random object. The point is to demonstrate timing, action, and exaggeration like a Loony Toons cartoon.
The professor chose a bra to be my object, so here’s my flour sack interacting with it.
Life Drawing Class Assignments
I find Life Drawing the most difficult of all the classes. I went in for extra life drawing about three evenings a week to improve – and while I find the whole process exhausting (you typically draw ~100 poses over 3 hours), I’m happy with my progress.
Here is my portfolio from the first half of the semester. It’s composed of 30 second, 1 minute, 3 minute, and 5 minute poses.
Click on any image to expand it and see how long the pose was.

")

")


")
")


For our next portfolio, we go to the Toronto Zoo to draw the animals.
Below are my sketches. The poses are comprised of quick gestures (30 seconds to 3 minutes) and studies (10 to 20 minutes).
Click on any image to expand it.


Here is my final portfolio from the last half of the semester.
Again, this portfolio is comprised of 30 second, 1 minute, 3 minute, and 5 minute poses. Click on any image to expand it and see how long the pose was.

")

")
")
")

")
")

Digital Painting Class Assignments
In Digital Painting we learn how background paintings are put together quickly in Photoshop.
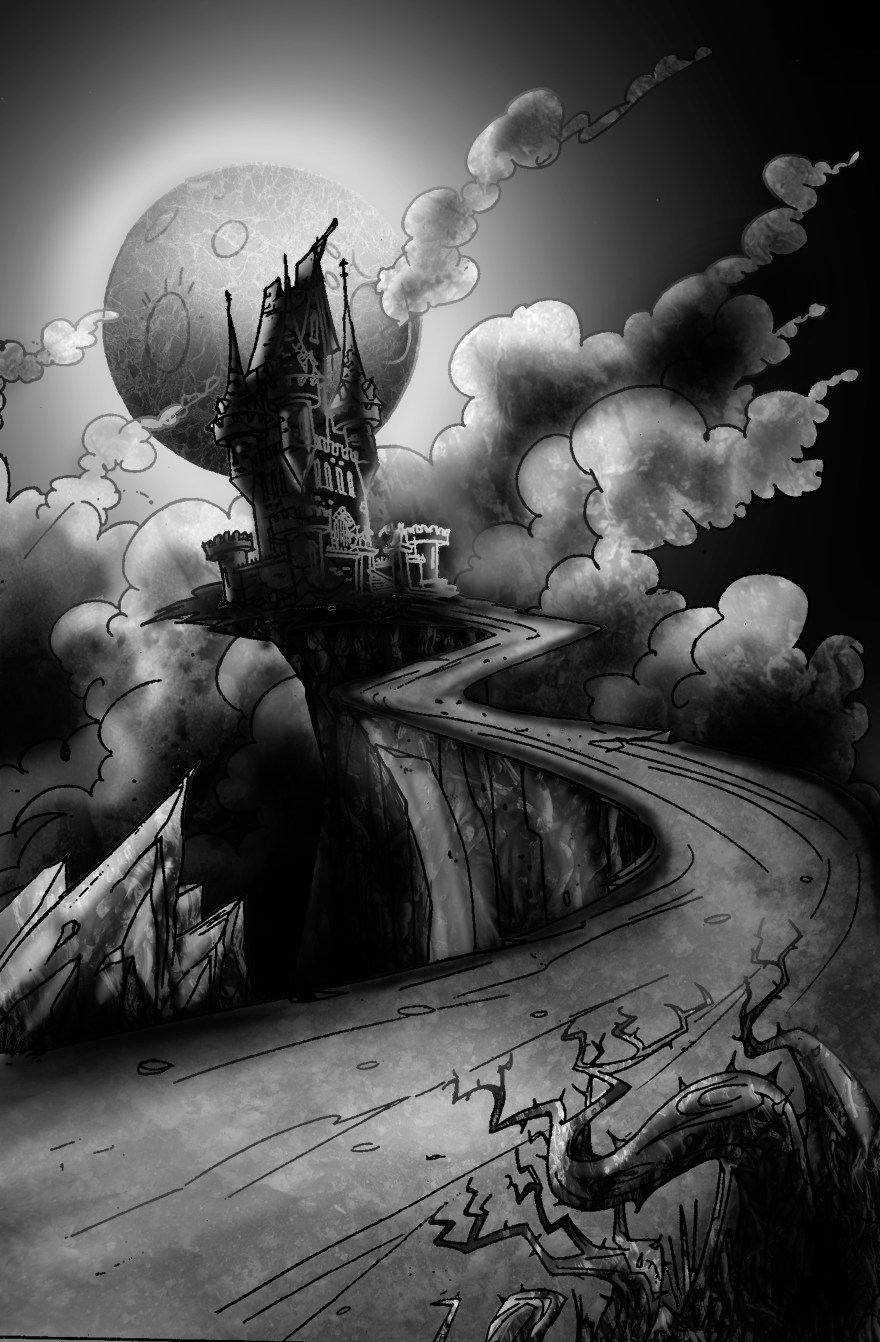
For the first assignment, we’re given a line drawing of a castle in front of a full moon. Our task is to separate the layers, then use gradients and textures to fill in the drawing and get it production-ready for a show.
Here’s my final image. We do this in class, so I didn’t spend too much time on it.
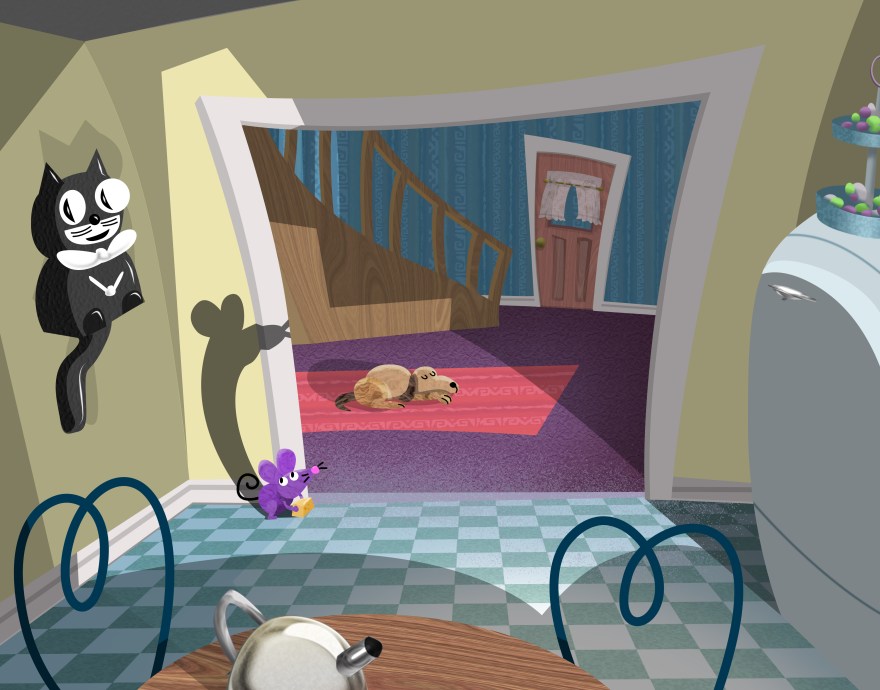
For our next assignment, we have to create an image and then paint a day and night version of it.
Here are my day and night paintings. This was my first attempt at painting digitally, so I learned a lot during this assignment.
Day:
Night:
Here is some of the detail closer up (notice the mouse in the window!)


For our next assignment, we’re given what’s called a Colour Key. A Colour Key is a completed image that you use to create other images from in the same style.
The image we’re given is of a graphically stylized kitchen created using the Photoshop Pen tool. It looks very similar to the image below. We actually have to recreate the Colour Key during class, so the image below is how far I got recreating the Colour Key (we don’t have to complete it):

Next, you must create an entirely new angle of the kitchen using the Photoshop Pen tool.
Here’s my new kitchen angle:
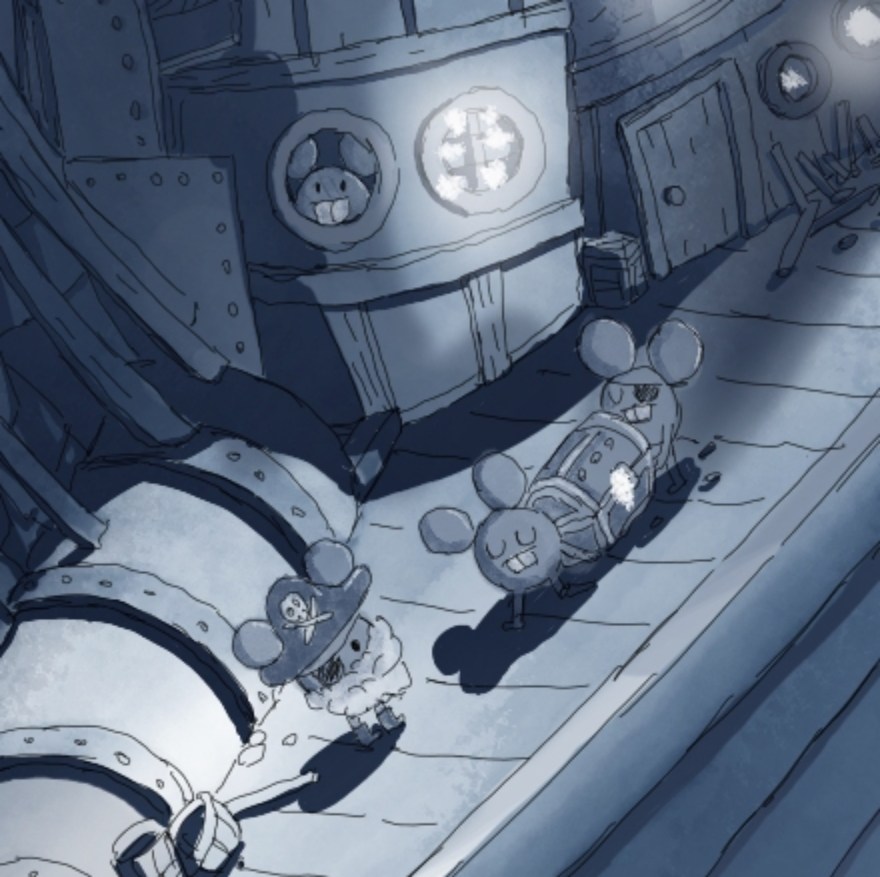
For our final Digital Painting assignment, we can paint anything we want,
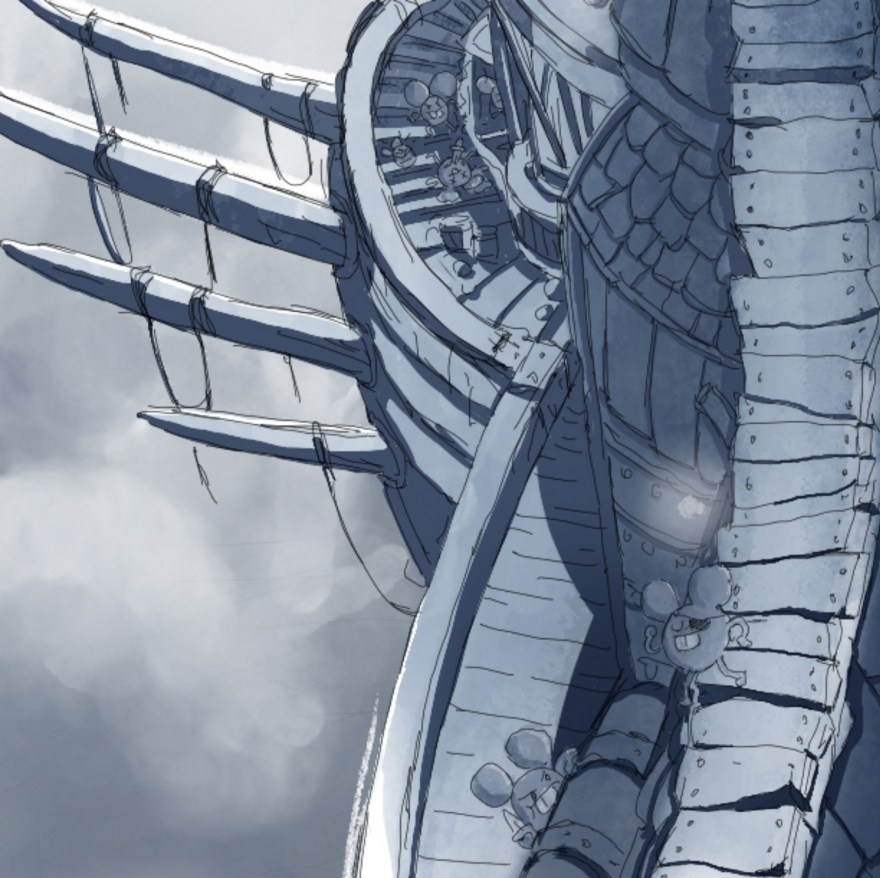
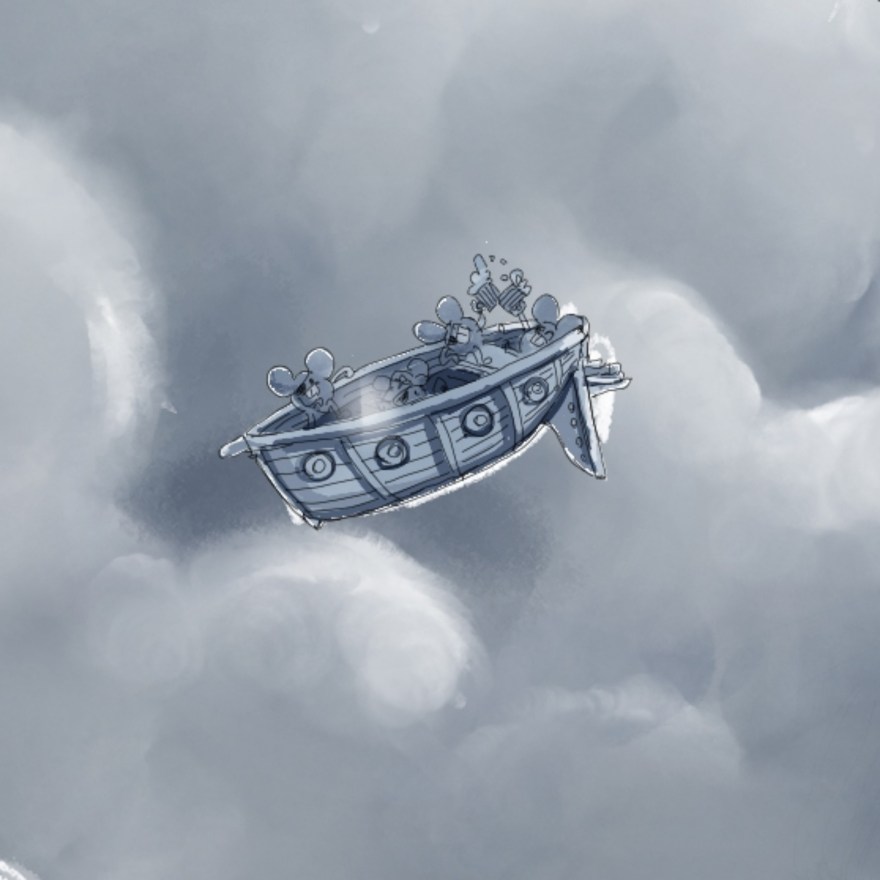
I chose to paint my mouse character from my That Guy Comic – he’s the same mouse that keeps popping up in all my animations and paintings if you look closely.
Here he is looking out over a city while a mouse pirate ship comes in through the clouds.

This painting is actually huge if you open it up.
I spent a lot of time making very tiny details throughout the image. Here are some of them:


Layout Class Assignments
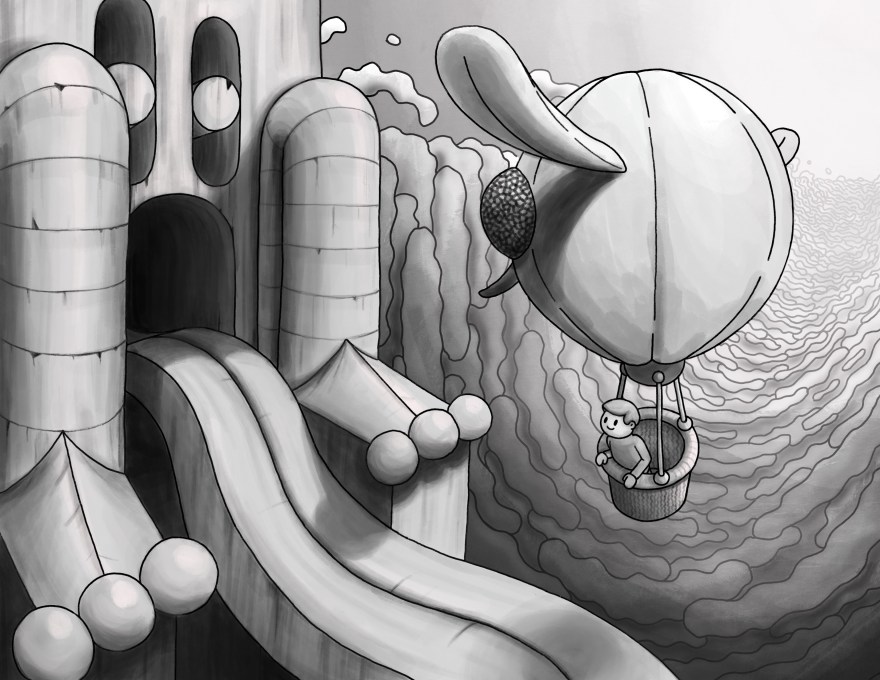
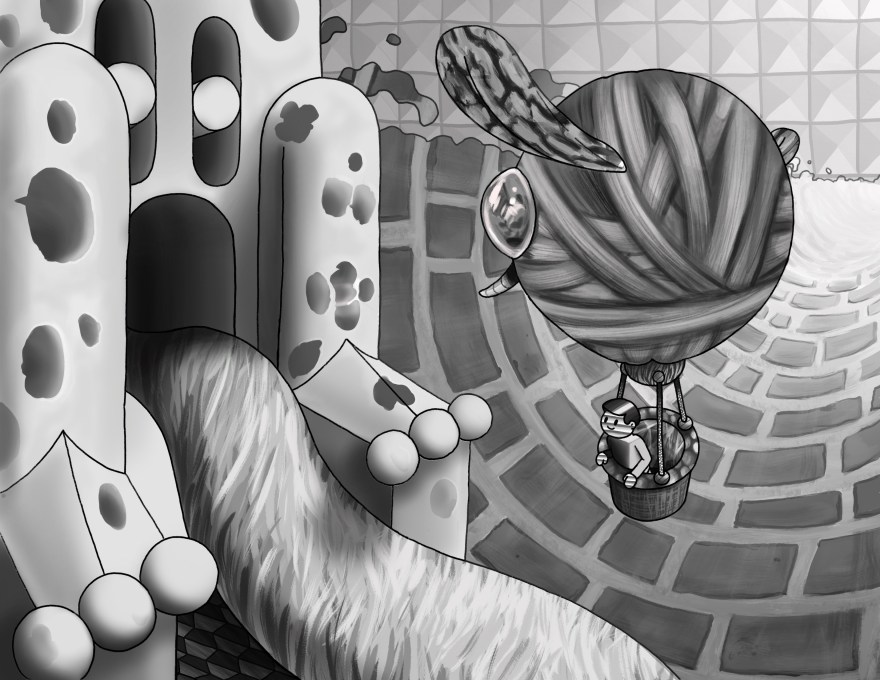
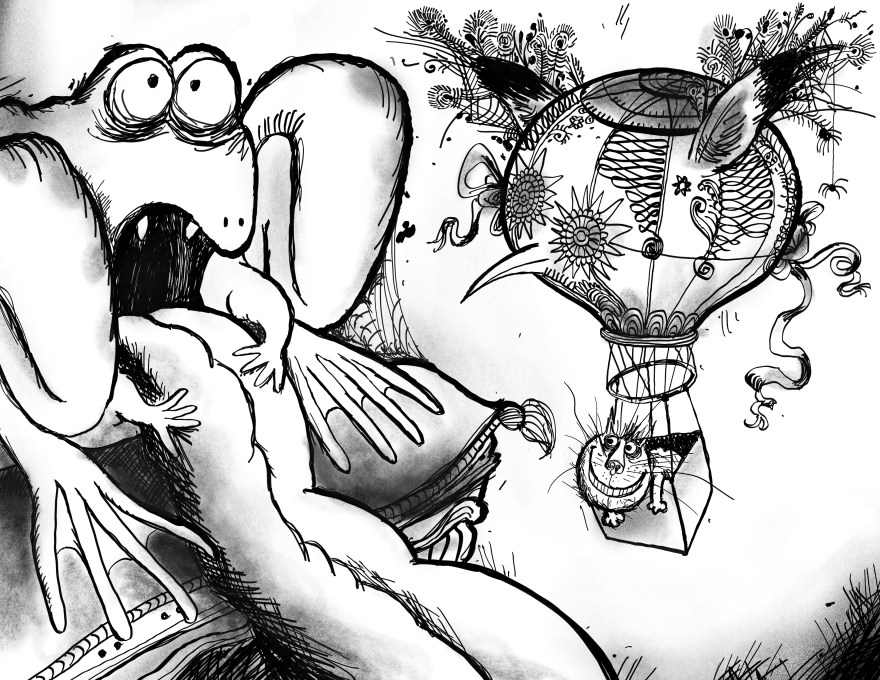
For our first layout assignment, we must draw a scene using proper perspective and then redraw it using three different texture techniques: normal texture, random texture, and texture in the style of English satirical cartoonist Ronald Searle.
I drew a scene of a hot air balloon entering a frog temple.
Here’s the scene with normal textures:
Here’s the scene with random textures:
Here’s the scene in the style of Ronald Searle:
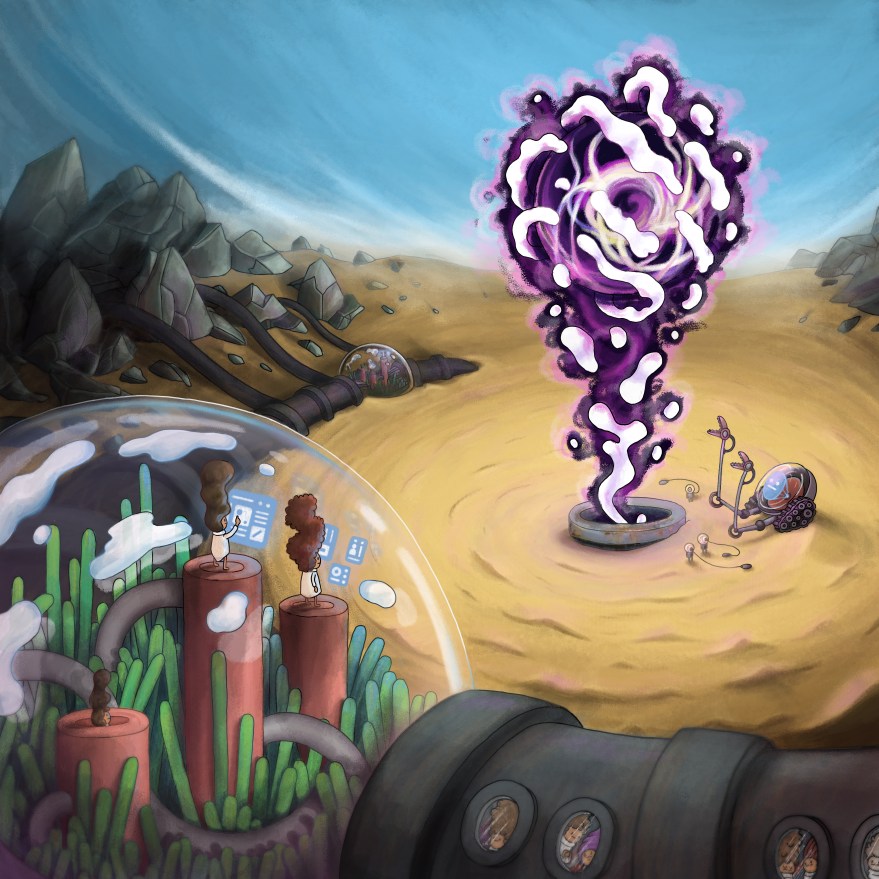
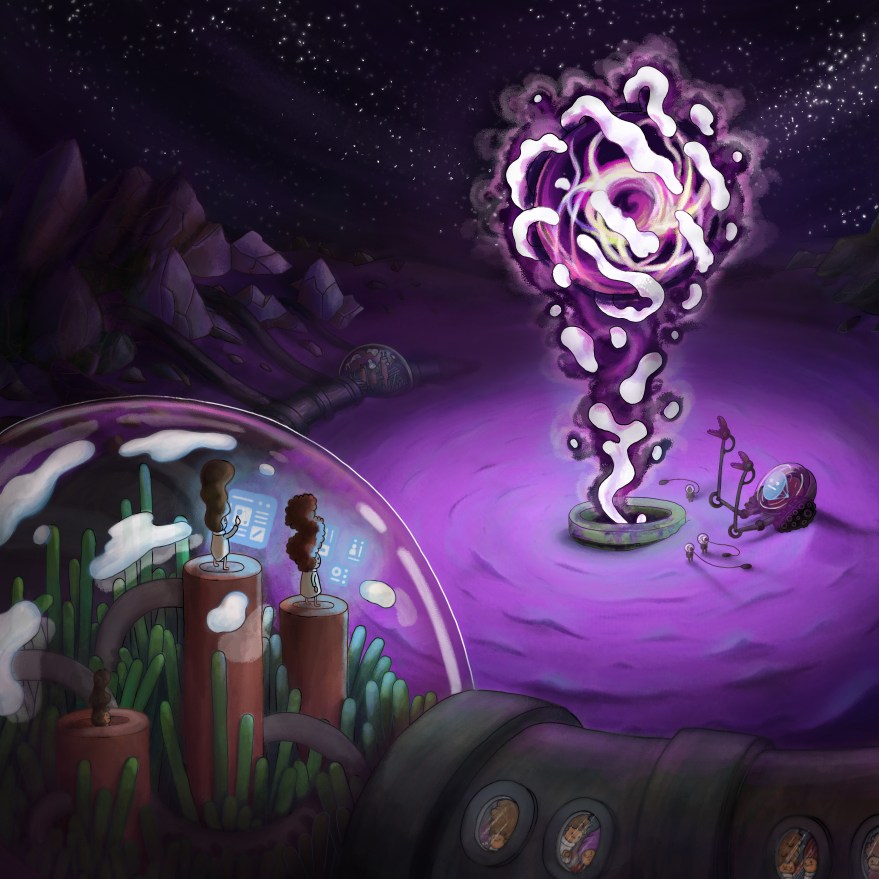
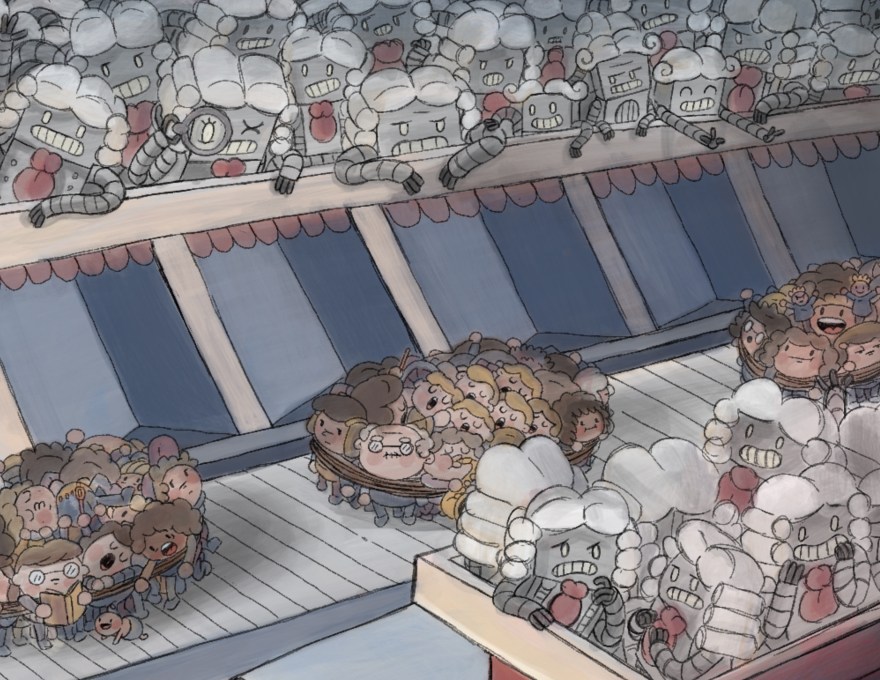
Our next assignment is called Big and Small.
Basically we have to draw a scene in perspective with a gigantic character or object and a minuscule character or object: think human vs Giant, or human vs fairy. We also have to set up the scene so that it works in a variety of shots that make everything look big, small, and big and small at the same time.
I also wrote a little story to go with my scene:
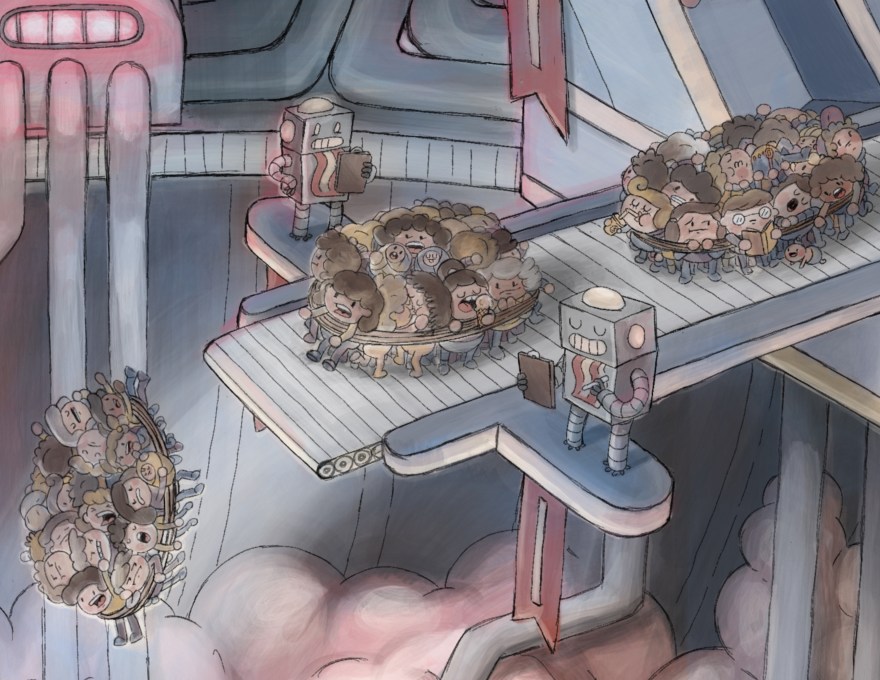
After the sun faded, the only energy source strong enough to power the core was the Gaping Mouth. Unfortunately the infrastructure needed to appease its voracious appetite for human sacrifices was immensely expensive. It wasn’t until the Business Bots began charging a hefty fee to watch the procession and cheer on the doomed that they started turning a profit.
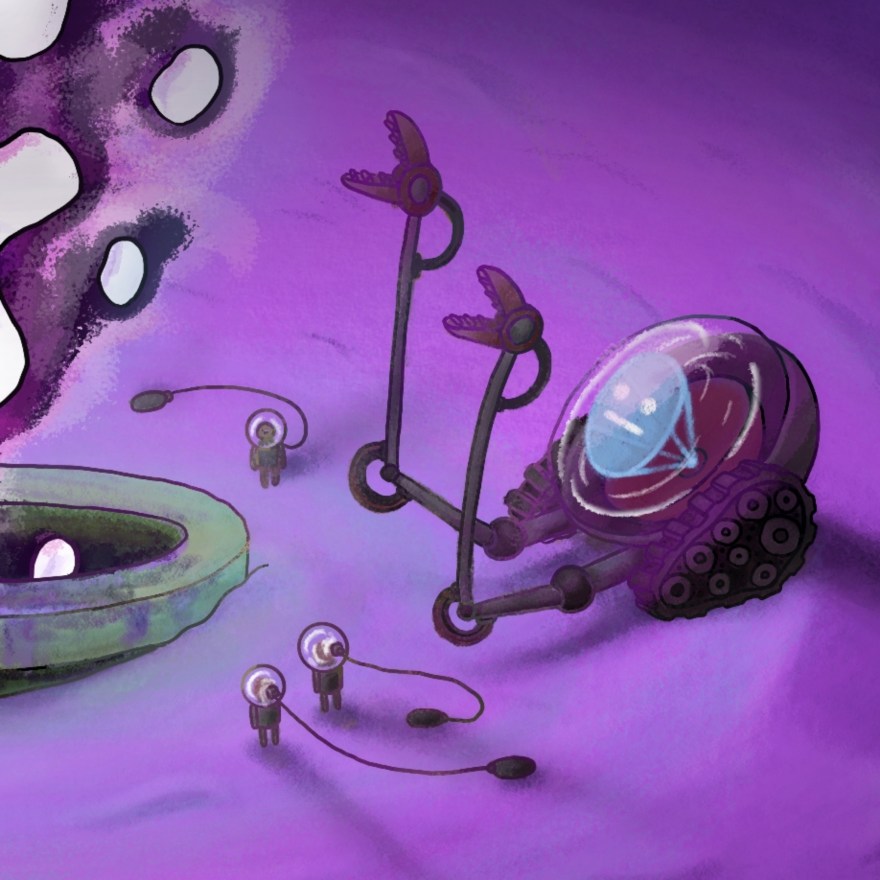
Here’s the small portion of the scene:
Again, another small portion:
Here’s the big portion of the scene:

And here’s the whole scene at once:

And of course I included a mouse 🙂

Here’s a short time-lapse video of how I drew the scene using perspective:
For our next assignment, we have to recreate an animation-ready scene from a storyboard of a past student film. Unfortunately I couldn’t find the film online to link to.
To make it animation-ready, we must draw the image as separate layers for underlays, overlays, special effects, and animation.
Below is the layered scene of a Babushka washing her clothes in a basin. I drew and coloured this based on the storyboard from the film:

Here is the scene broken into layers. You can see the background in the top right, the underlays and overlays in the bottom right and top left, and the animation and special effects layers in the bottom left.
The next assignment is similar to the horizontal pan assignment from last semester. For this assignment we have to create a repeating diagonal pan.
Here is mine. It’s actually quite large. Click on the image to see it in detail.

Here’s the same diagonal pan, but broken down into layers. On top is the animation layer with the two caterpillars carrying the princess box. Next is the overlay of the trees, and finally is the background greenery with the stone steps.
The final assignment is to put together a layout portfolio based on what we learned in each class:
- How to draw boats
- How to draw cars
- How to draw bridges/wooden constructions
- How to draw normal and spiral staircases
- Recreate a still frame from a movie, but build up all the objects and characters in perspective
- etc.
Here’s a selection of my layout portfolio work. Unfortunately because of the amount of assignments from other classes and this being the last assignment due before school ends, I wasn’t able to spend as much time on it as I would have liked.
Click on any image to see it in greater detail:
")
")
")
")
")
")
")
")
Digital Tools
For digital tools class, we learned the basics of Adobe Premiere and After Effects.
Storyboard Class
Storyboard Class is a continuation from last semester. I won’t be posting any of my storyboards, since they are easily copied and the same assignments are used year over year.
There are a number of assignments in this class including:
- Storyboard Tests: This is where we have to replicate still frames from a movie. We get about 15 seconds per frame and have to do about 100 of them in a row.
- Storyboard Studies: This is where we have to storyboard a scene from a film the Professor has chosen (Dressed to Kill), and a film of our choosing (I chose THX 1138).
- Research & Script Writing & Storyboard: This is where we are given the basic overview of a story and we must write the script, create a location with characters, and then storyboard everything out
This class also has a one-hour lecture where we learn the basics of setting up shots and telling stories visually.
Animation History
Our final class is a three-hour lecture on the history of animation from different parts of the world. This class has a number of tests and a final exam, but it’s not too difficult if you attend the classes, plus it’s quite interesting!
That’s All!
That’s everything from Sheridan’s Animation Program Year 1 Semester 2. I hope you enjoyed my work and found this insightful 🙂
If you’d like to see my work from last semester, you can find it here: Sheridan Animation Year 1 Semester 1.
And, if you’d like to follow me on Instagram, I post more of my art there (plus I’m not as serious as I probably sound in this post).
Thanks for reading 🙂
How to Get into Sheridan’s Animation Program
If you’re interested in applying to Sheridan’s Animation Program, click here to see my accepted entrance portfolio and my best advice on how to get in.
If you have any questions, I’d be happy to answer them. You can get in touch with me at terrystories@gmail.com.
Thanks for reading!
Are You an Ultra Animation Industry Fan?
If so, I also run a podcast where I interview some ultra rad animation people like Fred Seibert, Ryan Quincy, and Sarah Nelson on how they got into the industry and all that.
You can find the podcast here: Animation Industry Podcast.

How was this semester in Sheridan?
I love your work
LikeLike
Thanks Diana, this last semester was great. I plan on posting all my assignments soon 🙂
LikeLike