
My name is Terry and I’m in the animation program at Sheridan College. Below you can find all my assignments from Year 1, Semester 1.
Before each assignment I briefly explain the requirements. Overall, I got a 3.8/4.0 GPA. However, I won’t share my marks for individual assignments (if you really want to know, you can email me at terrystories@gmail.com).
If you’d like to see my work for second semester, you can find it all here.
A Break Down of Year 1 Semester 1
The first semester in Sheridan’s Animation Program has a total of eight courses broken into nine classes:
- Principles of Layout: 2 hour class
- Introduction to Painting: 2 hour class
- Character Design: 2 hour class
- Introduction to Life Drawing: 3 hour class
- Animation Principles: 2 hour class
- Introduction to Digital Tools: 2 hour class
- Story Development (composed of two classes)
- Storyboard Class: 2 hour class
- Story Principles Lecture: 1 hour class
- Composition and Rhetoric: 2 hour class
- Composition and Rhetoric Lab: 1 hour
The last class, Composition and Rhetoric is an English class which is mandatory for all Sheridan undergraduate programs. However, I was exempt since I have a previously completed Bachelor of Business Administration degree from Wilfrid Laurier.
Now, without further ado, here is my portfolio from each class.
Principles of Layout
In Principles of Layout, you learn how to use vanishing points to create objects and characters that appear correctly in any type of perspective.
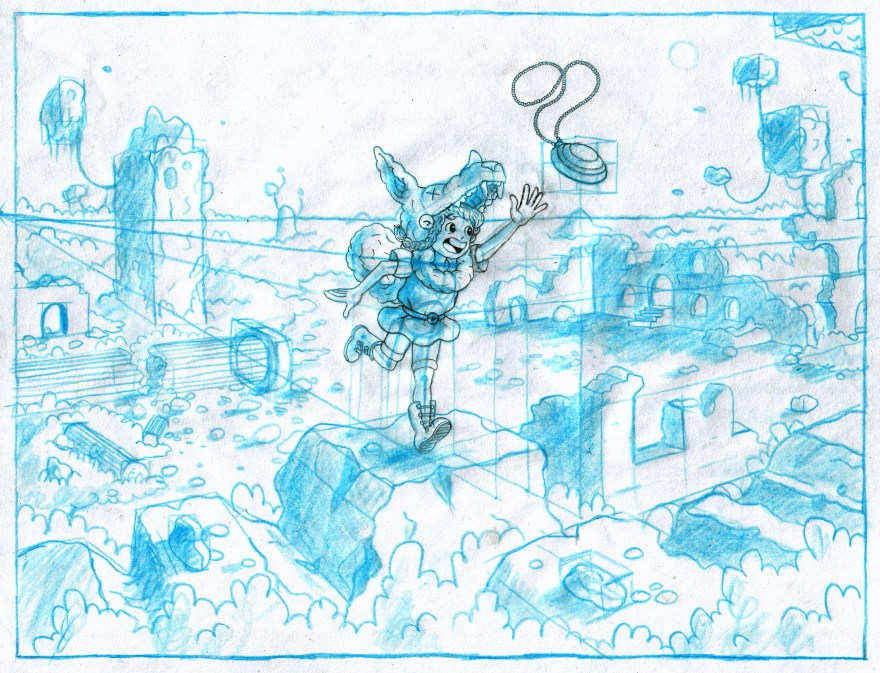
Project 1: Character in a Scene
In this assignment, you must draw a character, then find the vanishing points based on their stance (shoulder line, hip line, and foot line). Then you simply fill in the rest of the page with structures and objects to create a scene.
I chose to draw Juna, a character from my fantasy novel. Looking at the image below, you can see how the perspective lines are drawn from her shoulders, hips, and feet to find the vanishing points in the distance.
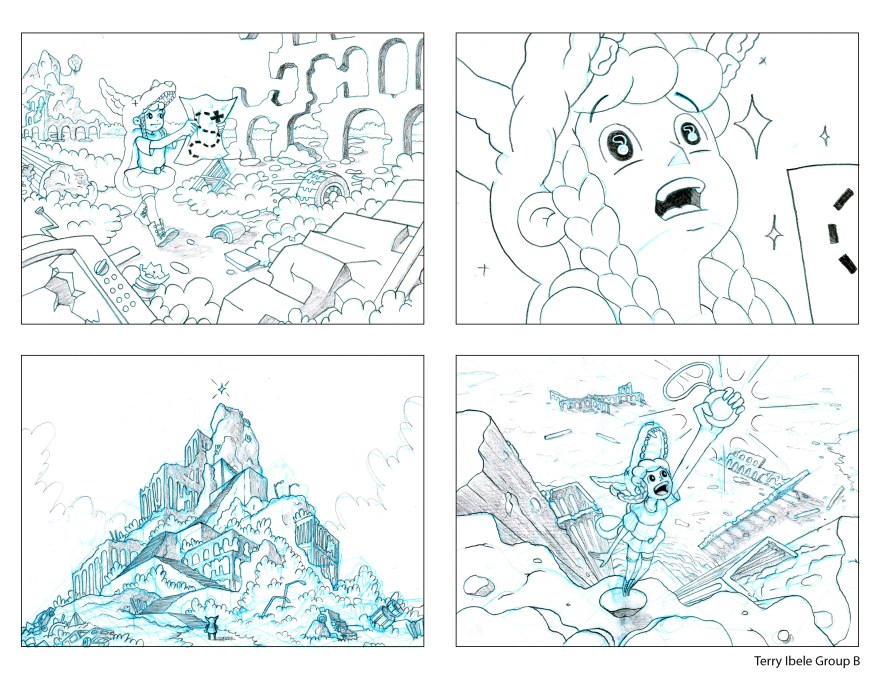
Project 2: Story Using Different Shots
For this assignment, you must recreate 3-5 shots (long, medium, close-up) from the character and scene in the above project to tell a story.
My story is about Juna searching for a pendant.
My last panel, which uses 3-point perspective, has a major flaw – according to the perspective I used, Juna is stretched out to be something like 20 feet tall! If I were to redraw it, I would do a better job measuring her proportions, which would make her much more condensed.
Project 3: Field Guide
In this assignment, you must take one scene from the Project 2, and apply industry field guide labeling to it, which is a fancy way of saying what animation happens in the shot and how the camera moves.
In my scene, Juna walks from left to right as the camera trucks out. You can find the field guide instructions to this in the bottom of the image below.

Project 4: Pan
For this project, the goal is to create repeating foreground and background layers. However, you don’t want a viewer to notice that the layers repeat, so you must draw indistinct details.
You’ve likely seen repeating pan backgrounds in many animations, such as when a character is running, or when the camera pans quickly through a scene.
You can expand my pan by clicking on it below.

Project 5: Layout Assortment
During each class in the semester we learned how to draw a different type of layout, such as a curving road, or how to draw gables on houses. The final assignment is to polish up eight of these in-class assignments.
Below are my eight redone layouts. You can click on each image to see a larger version, and to discover what the assignment was.


Introduction to Painting (With Gouache)
The purpose of painting class is to teach you the principles of light, shadow, opaque vs transparency, gradient, depth of field, sky, colour, and texture.
Project 1: Opaque, Transparency, Gradient
The requirements of this project speak for themselves once you see my studies, but perhaps the biggest learning curve is simply how to paint with gouache. Gouache is not an easy medium to start out with – it’s somewhere between watercolor and acrylic, but never fully dries. It’s also quite expensive. It costs anywhere from $10 – $20 for a small tube, and you need to buy eight different colours, which are below:
- white (you’ll need a big tube!)
- black
- warm yellow
- cold yellow
- warm blue
- cold blue
- warm red
- cold red
Here are my opaque, transparent, and gradient studies:


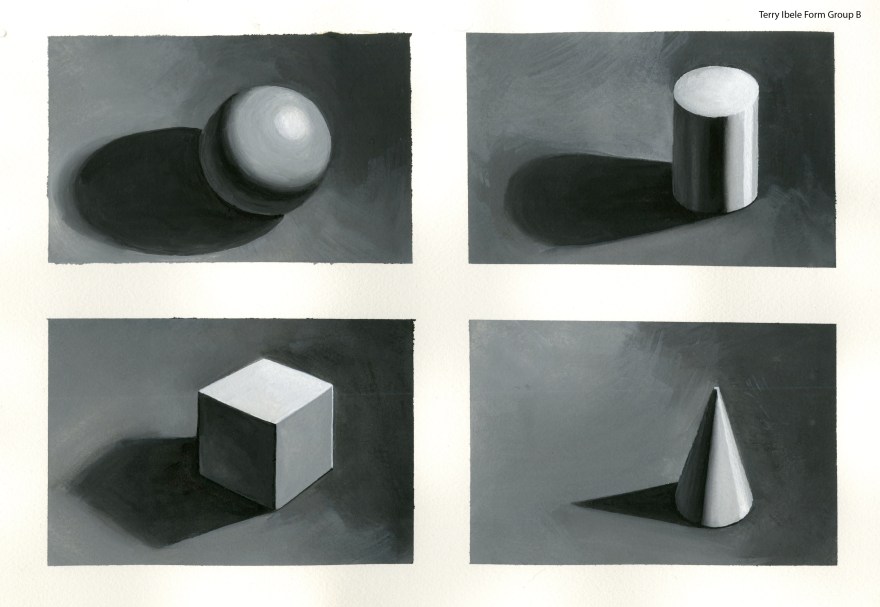
Project 2: Form Rendering – Light and Shadow
The purpose of this project was to study how light interacts with objects and creates shadows to create realistic looking form. To do this, we shone flashlights onto wooden shapes and then painted our observations.
We were also graded on our attention to the eight basic elements of light and shadow:
- Highlight (where light directly hits the object)
- Halftone Light (the rest of the lit side of the object)
- Terminator (the mid line between the lit and unlit parts of the object)
- Core Shadow (the main dark area of an object)
- Reflected Light (the dark side of the object, which is slightly lit by light being reflected back onto it from the ground)
- Occlusion Shadow (the darkest point which is where the object is closest to the ground)
- Cast Shadow (the shadow created from the object)
- Penumbra (the soft edge of the end of the shadow)
Finally, we learned the Rembrandt technique of background lighting, which creates more appealing images. The technique is simply to paint a lighter background beside the shadow of an object, and a darker background beside the highlight of an object. This makes the object stand out more. You can see this technique used in my studies.
Here are my studies:
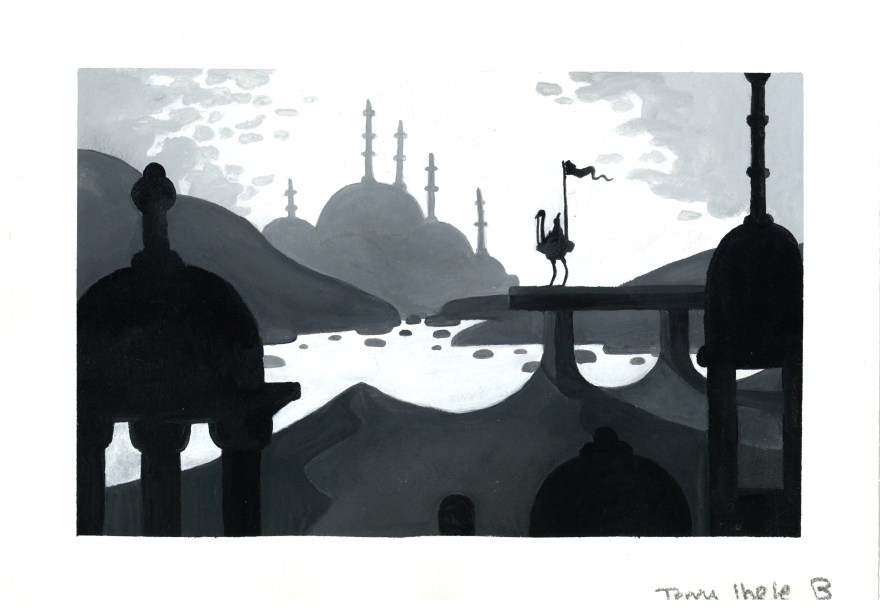
Project 3: Gray to Colour
There are three main aspects to this project: depth and tone, gradient, monochromatic colour. Each aspect requires its own painting.
First, you must create a layout which demonstrates depth of field using layers, light, and color. You are encouraged to study other paintings to create your layout.
Once you’ve developed your layout, you paint it in flat tones.
The next step is to paint your layout again using gradients to show light.
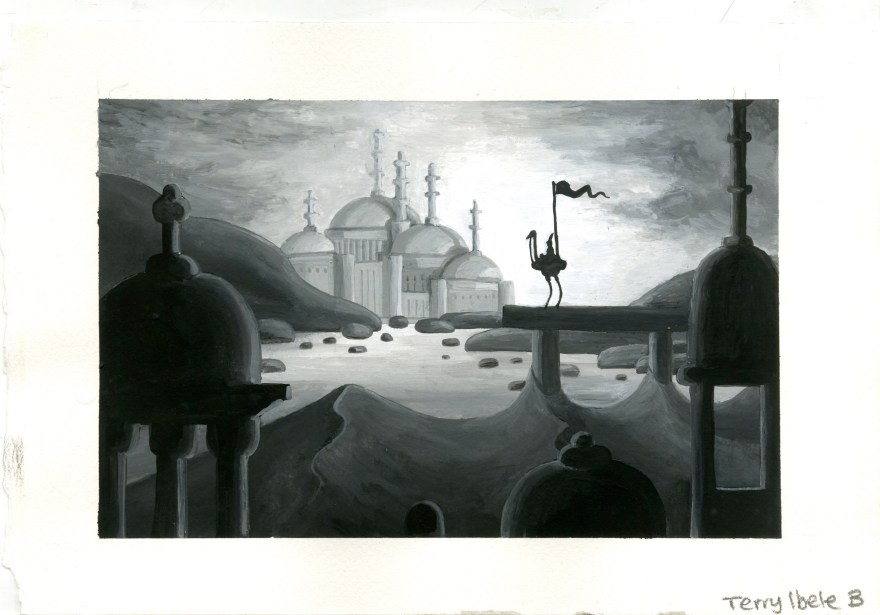
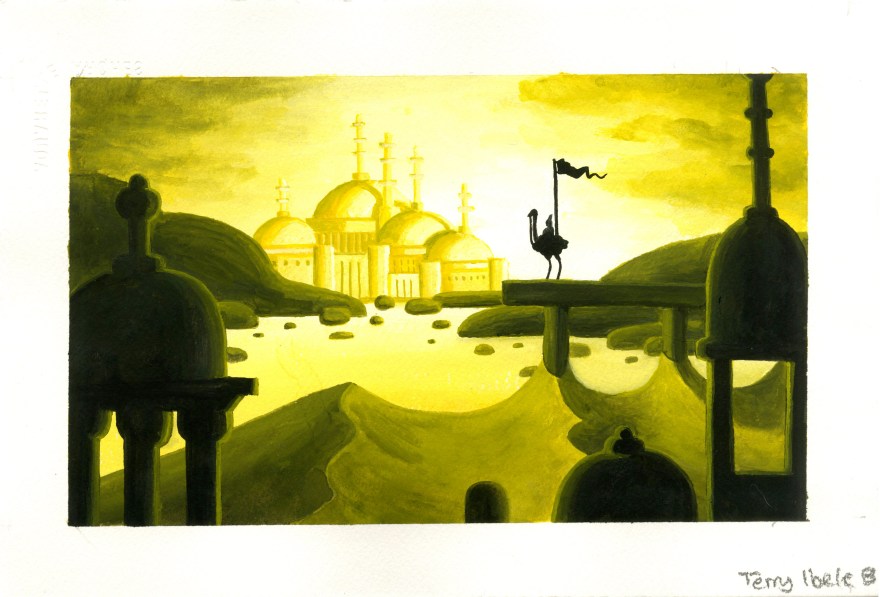
The final step is to paint your layout in a monochromatic gradient (color of your choice!)
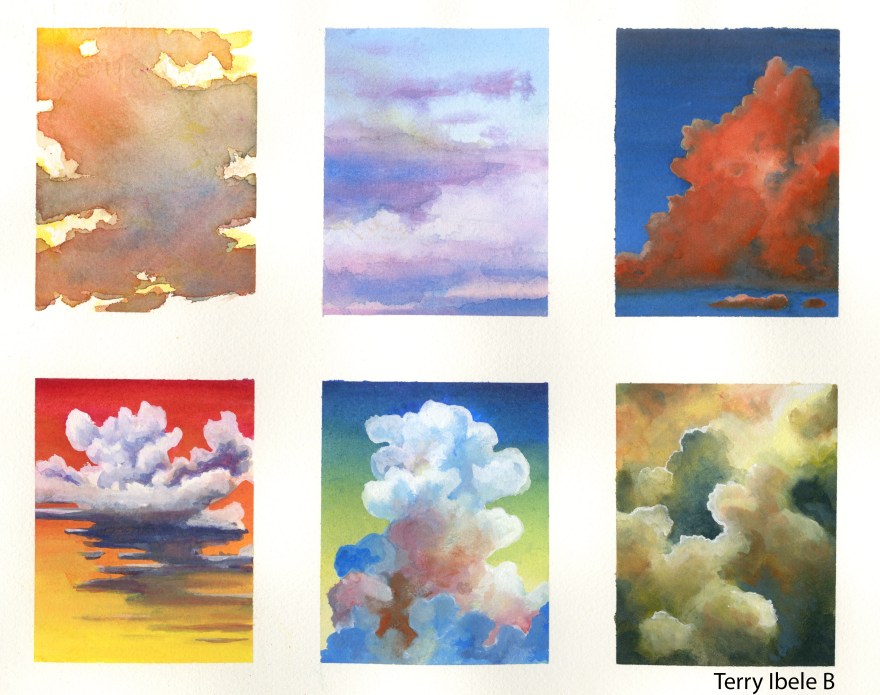
Project 4: Cloud Studies
The reason we study clouds is because the sky is present in nearly every scene created in an animation. The sky is also important in setting the mood of a scene (think of a thunderstorm vs a sunny day).
We are also encouraged to experiment with different techniques to create different cloud effects, like adding salt to the paint, or painting with a sponge.
Here are my six cloud studies:
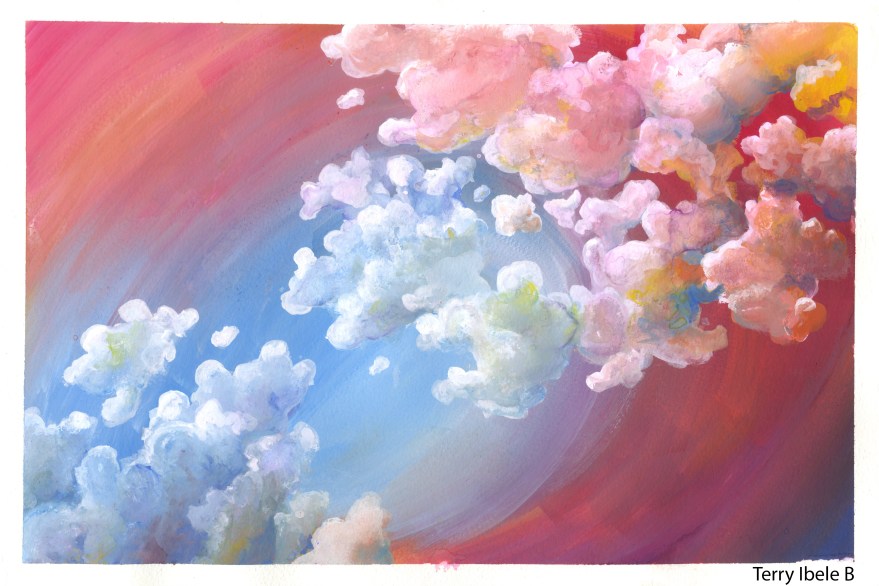
Here is my final cloud composition:
Project 5: Texture Studies
This is the final assignment of the semester. We must choose four different textures (hard, soft, hairy, etc.) to recreate photo-realistically.
I chose strawberry cheesecake (juicy), crystals (hard/sharp), cherries, (shiny) and water droplets (watery).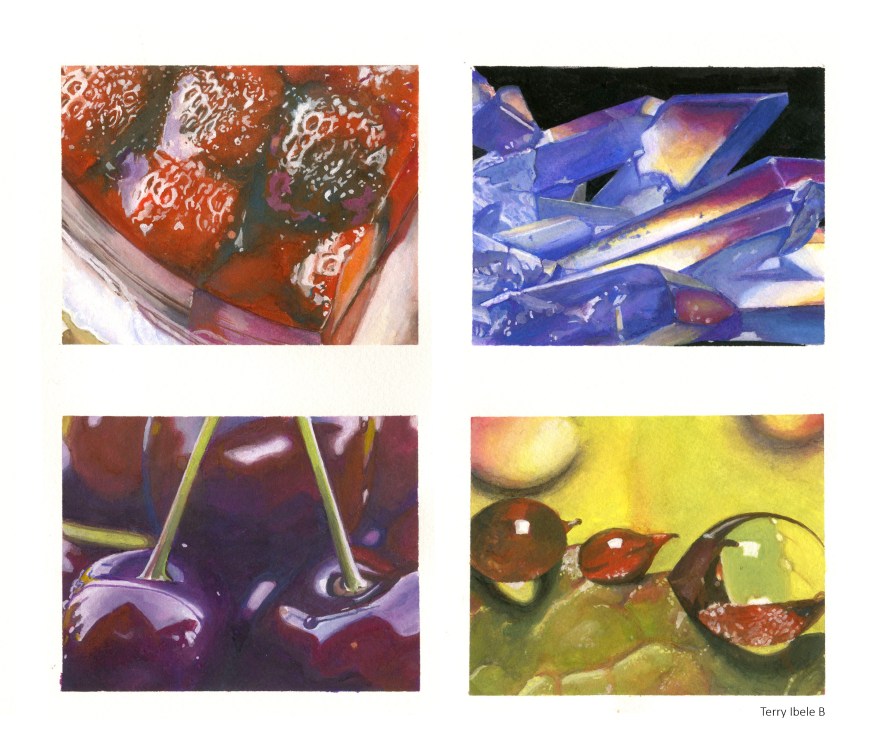
Character Design
The purpose of this class is to be able to create and communicate animation-ready character designs
Project 1: Character in Rotation
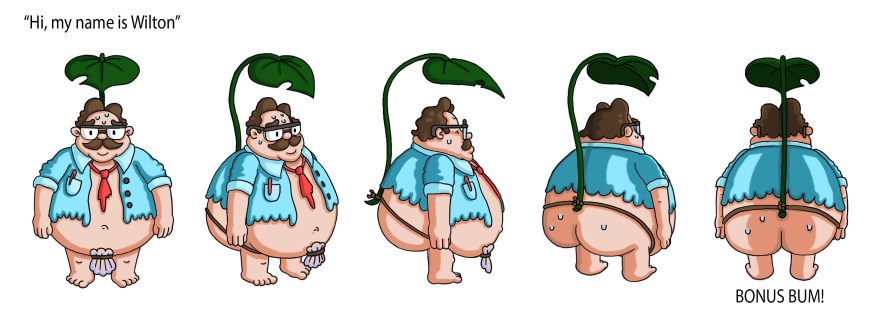
The purpose of this assignment is to create a character and use proper 2-point perspective to consistently rotate it in space. This is important because an animator must know what the character looks like from every angle in order to animate it in any situation.
Here is my character, Wilton. He’s a businessman who’s been deserted on an island. The rotations are:
- Front
- 3/4 Front
- Side
- 3/4 Back
- Back (not necessary, but I wanted to do it because of bonus bum!)
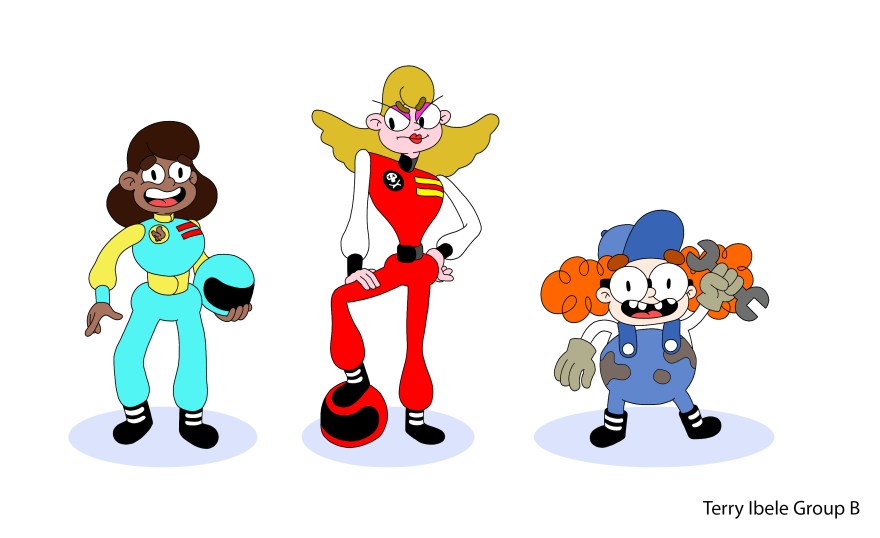
Project 2: Protagonist, Antagonist, Comedic Relief
One of the biggest ways to enable storytelling in animation is to make the visuals very simple and clear. This means that any viewer can immediately recognize any element in the animation, be it the location, action, or characters.
For this assignment, we’re tasked with creating three original characters that are immediately recognizable as the Protagonist, Antagonist, and Comedic Relief.
Here are my characters. My idea is that they are from a show about a Women’s NASCAR Racing League.
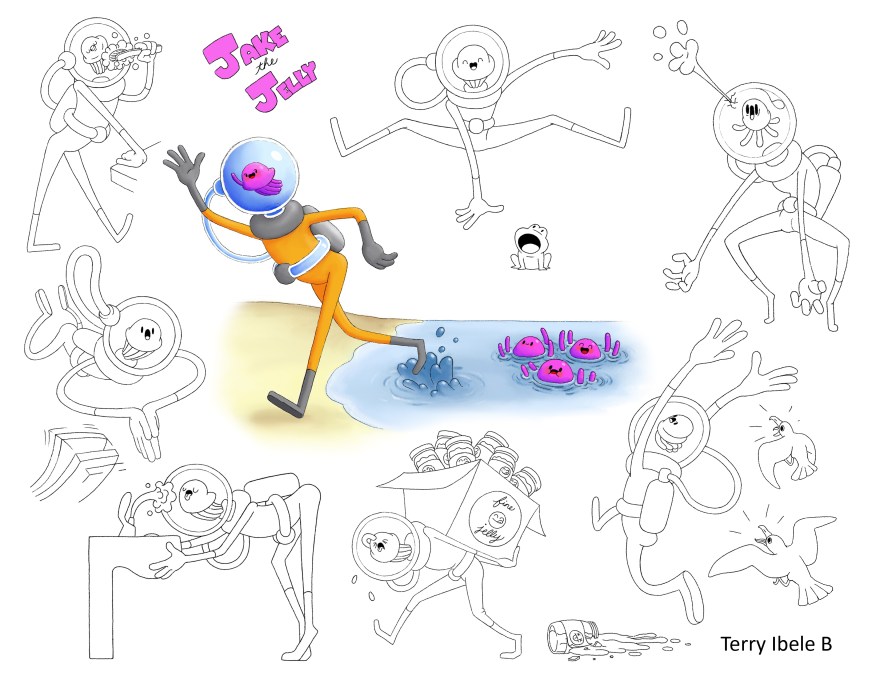
Project 3: Character Posing
Another important visual storytelling component is the information conveyed in a character’s actions.
For this assignment, we were tasked to create eight character poses that immediately convey what the character is doing. We were also to use a variety of angles: front, 3/4 back, 3/4 front, and side.
My idea was a jellyfish who leaves the ocean in a suit to explore life on land.
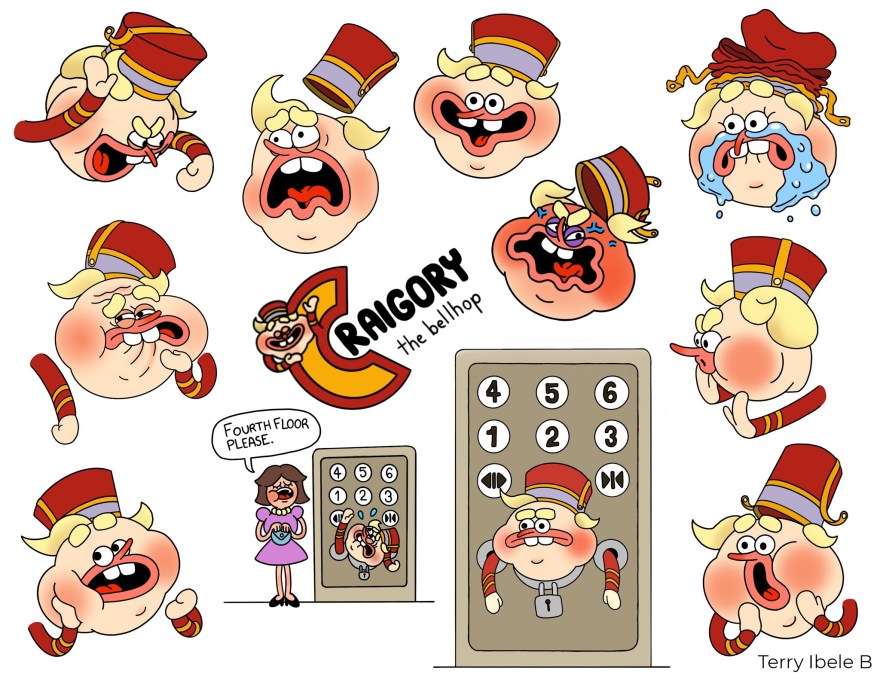
Project 4: Character Expression
Continuing on with visual storytelling, this assignment is to create a character and explore their expressions. You must create nine expressions from different angles: front, 3/4 back, 3/4 front, side.
The character I created was a bellhop who’s been sentenced to the elevator pillory.
Project 5: Character in Another Artist’s Style
The final project in this class is to study another artist’s work (your pick!) and create a presentation on them, which includes the following:
- A brief history of the artist’s life and work (1-2 minutes)
- The elements of style the artist utilizes
- What can be learned from their work
- A creation of your own character in the artists’ style
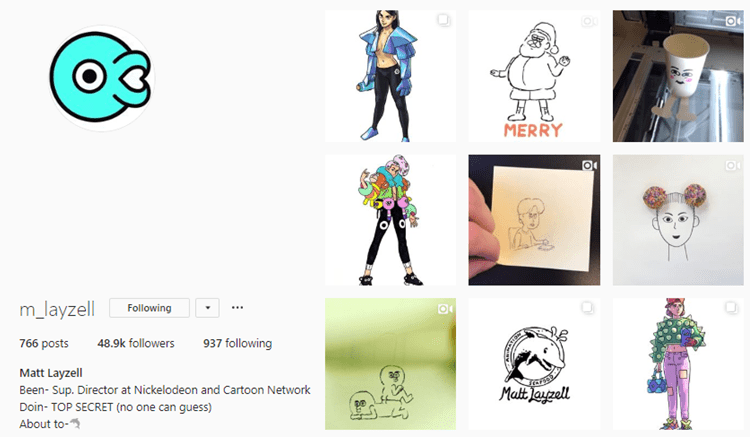
For my presentation, I chose Matt Layzell. He was a Supervising Director at Nickelodeon and Cartoon Network and is currently directing his own show for Netflix.
I first discovered Matt’s work on Instagram and immediately fell in love with it. I encourage you to check his stuff out too by clicking the image below:
I attempted Matt’s style by drawing a waitress from a diner who’s wearing the menu (plus a bonus pup!)
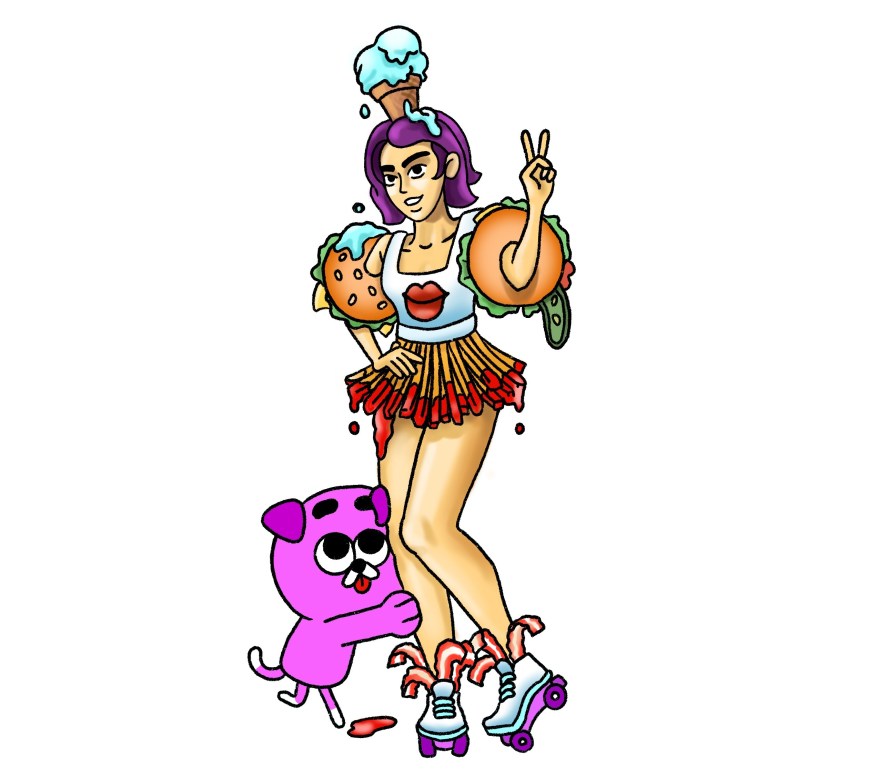
I tried to get in touch with Matt to show him, but was unsuccessful 😦
Introduction to Life Drawing
“I wish I had gone to more life drawing classes” was one of the most common things I heard from animation graduates.
Now I understand why.
I’ve found life drawing to be the most difficult part of the program so far – and the only way to get better is to practice over and over, hundreds of times.
Life drawing is extremely important to animation, because it teaches you to draw any character in any pose in seconds.
A good life drawing will also convey many elements, including:
- pose (weight, movement, etc.)
- structure
- line weight
- contour
- foreshortening
- and more
In the animation program, we have Life Drawing class once a week, but it is also offered every night for extra practice.
Project 1: Portfolio 1
This project is due at the end of the first half of the semester, where you must submit 10 drawings:
- 2 thirty-second poses
- 2 one-minute poses
- 2 three-minute poses
- 2 five-minute poses
- 2 of your choice
Here is my first portfolio. You can click on each image to increase its size and see how long the pose was.


Project 2: Portfolio 2
This project has the same requirements as the previous one, it’s just submitted at the end of the second half of the semester to show how you’ve improved.


Project 3: Hands and Feet Portfolio
The requirements for this project are to study human, reptile, insect, bird, and mammal hands and feet. You must also choose a theme to tell a story.
Here is mine. Click on each image to expand it:


Project 4: Royal Winter Fair Portfolio
At the Canadian Exhibition, there’s a Royal Winter Fair that takes place in the fall (ironically). For this project, you must go to the fair and do life drawings of the birds and animals.
Here are my drawings. Click on each image to expand it:


Project 5: Bone Portfolio
The final project of the semester is to study the parts of the skull, scapula, vertebrae, and pelvis (using real and plastic bones which are given to take home). You must also study how they enable movement, and tell a story with your drawings.
Here is my bone portfolio. Click on each image to expand it:


Animation Principles
In animation class, we learn the basic principles that will enable us to animate anything in the future.
Project 1: Pendulum and Ball Studies
For the pendulum study, we have to create a pendulum which swings back and forth in a loop. You’ll notice it swings faster at the bottom, and slower when it gets to the top on either side:
Next are my ball studies. The purpose of the ball studies is to study weight, squash and stretch, timing, and objects interacting with their environment.
The first is the balloon. For this assignment, you must show a balloon coming in from a window on the left, lightly falling to the ground, hitting a box, and coming to rest on the floor. The background animation is unnecessary, but I wanted to have some extra fun.
Next is the bouncing ball. You must show a ball falling from the ceiling, bouncing off a box, onto the floor, and out a window on the left. Things to note are the squash and stretch principles when the ball bounces, and the hang time in the air.
The last ball study is the bowling ball. The reason a bowling ball is animated is to convey weight. Things to note in this animation are the speed of which the bowling ball drops, the slow fall over the edge of the box, and the slight bounce when it hits the ground before it rolls away.
Project 2: S and C Curve
The principles of S and C curve are studied in this assignment. The S and C curve are fundamental to all fluid motion in animation – from how hair blows in the wind, to an arm waving.
The first part of this assignment is to simply follow a template that moves a line back and forth. You can see the distinct “C” when it falls and the “S” when it picks itself up again.
The second part of this assignment is to apply the S and C curve to a book page using perspective. Here is mine:
The third and final portion of this assignment is to choose a marine animal to animate using S and C curve. I chose a dolphin. You can see the S and C in its tail. Part of the assignment is to study a real life marine animal’s motions and replicate them (vs the cartoony-motion that I applied). A basic background is provided to give the illusion that the animal is moving forward. Other students animated animals like jellyfish, seals, sharks, and goldfish.
Project 4: Timing
For this project, we study how timing effects motion.
The first portion of this assignment is to create a rough animation of a character pointing at an object with the arm dropping slowly at the start and ending fast.
The second portion of this assignment is to use the same key frames from the first portion, but to have the arm drop fast, then end slow.
As an extra study, you can also explore how a character would lift its arm and slam it on the table. Here is my attempt.
The final portion of this assignment is to create a rough animation of a character picking up a ball and throwing it into the distance. Here is mine.
Project 5: Balls with Ears and Tails
The final project is to animate two bouncing balls, one with ears (C curve), and one with a tail (S curve) to tell a story. You must incorporate all the elements learned so far.
The requirements for this project are that the characters must come in from the distance, move to the foreground, and interact in some fashion. Everything else is up to you.
Here is my final animation:
Introduction to Digital Tools
While we completed many projects in this class, I’m not posting any of mine. The reason is because they are simply results of following specific instructions that help us learn Adobe Photoshop, Harmony Toon Boom, Harmony Storyboard Pro, and Adobe Premier.
The projects include creating:
- A title board
- A simple animation
- A moving pan
- A storyboard
- A demo reel
- and more
Story Development
Story Development is broken into two classes:
Class 1: Story Lecture
This class is simple a 1-hour lecture which introduces you to the concepts of story structure (beginning, middle, end, conflict, etc.), characters (protagonist, antagonist, etc.), and other useful elements like eyeline, and shot hook-up.
There are two tests in this class, which get added to your overall Story Development mark.
Class 2: Storyboard Class
In this class, you learn the history and basics of storyboarding and shot composition. You must also create your own storyboards based on the requirements. I am not posting mine, because they can be easily copied, which ruins the point of these assignments.
The part of this class I found most useful were the storyboard tests. During class, a clip from a movie is played. At the start of each new shot, the screen is paused for 15-30 seconds. During that time, you must replicate the composition from that shot onto a storyboard.
While I found these tests a bit nerve-wracking, I greatly appreciated them. They taught me how to quickly convey complex compositions in just a few lines.
Bonus! 24 Hour Film Competition
Besides your regular classes, you also have the opportunity to participate in the 24 Hour Animation Student Film Competition open to all animation students worldwide.
The competition is judged by artists from some of the biggest studios in the industry including Dreamworks, Disney, and Laika, so it’s a great opportunity to get some decent exposure.
The requirements are simple:
- Be an animation student
- Have a team of 5 students
- Create an animation in 24 hours (based on the theme provided)
- Your film must be exactly 30 seconds long
- Be creative!
Here is the theme for the year we competed:
In 24 hours make a 30-second animated film depicting a strong point of view educating to your audience about the need to have empathy. Whether it be race, gender, lifestyle, social mobility, disability, geography, or even species, we all face challenges in making our reality be understood. Animate an experience that will help convey to the audience what it is really like to speak your truth.
Below you can watch our entry and judge how well we did for yourself 🙂
Overall, I am extremely proud of our team for finishing. We learned so much about story, production, animation tools, and team work.
Plus, we came 14th out of 219 teams!
If you’d like to see the winning entry, you can find it here.
That’s it! Now you’ve seen my entire Sheridan Animation Portfolio for Year 1 Semester 1.
How to Get into Sheridan’s Animation Program
If you’re interested in applying to Sheridan’s Animation Program, click here to see my accepted entrance portfolio and my best advice on how to get in.
If you have any questions, I’d be happy to answer them. You can get in touch with me at terrystories@gmail.com.
Thanks for reading!
Are You an Ultra Animation Industry Fan?
If so, I also run a podcast where I interview some ultra rad animation people like Fred Seibert, Ryan Quincy, and Sarah Nelson on how they got into the industry and all that.
You can find the podcast here: Animation Industry Podcast.

wow! i really want to study animation so seeing this is super interesting! your stuff is AMAZING. I hope that your career is going well!
LikeLike